Do you want to maximize your web browsing efficiency on Ubuntu? Look no further. In this guide, we will share straightforward steps to install Chrome on Ubuntu.
Say goodbye to compatibility concerns and enjoy a feature-rich web browsing experience with Chrome. It is a fast, secure, and feature-rich browser to give you the ultimate internet experience. Today, most of the things we do on our computers are on the web.
Our step-by-step process will empower you to integrate Chrome and Ubuntu with ease. Let’s dive into the world of a smooth web browsing experience.
System Requirements and Essentials for Installing Chrome on Ubuntu
To install Chrome on Ubuntu, you need to consider the following.
- Must have Pentium 4 or newer processor with SSE3 capability
- Must be logged in to Admin account
Suggested Read: How to Format SSD
Install Chrome on Ubuntu: 2 Methods (GUI and Terminal)
Ubuntu comes pre-installed with Mozilla Firefox. You can use Firefox as your default browser or try Google Chrome instead with the help of the steps listed here.
You may want to try installing Chrome for Ubuntu from the official Ubuntu software center. Google Chrome is not an open-source browser, so you won’t find it there. Ubuntu Software Center will probably suggest the installation of the Chromium browser, an open-source browser from which Chrome is derived.
So, how do you install Google Chrome on Ubuntu? Well, read the methods below to learn about the Chrome installation for Ubuntu.
There are two ways you can install Chrome on Ubuntu.
- Use the graphical user interface (GUI)
- Use the command line method using the terminal
But first, we will take a look at the prerequisites.
Step-by-Step: Installing Chrome for Ubuntu [Method 1]
Well, installing Chrome for Ubuntu is not a difficult task. However, if you are completely new to the world of Linux and Ubuntu, this might be overwhelming for you.
This is why we will share the installation steps in detail.
You should know that Google Chrome is only available for 64-bit operating systems. So, you have to make sure that the Ubuntu version you’ve installed on your computer is 64-bit.
Now, let’s take a look at the steps required for installation.
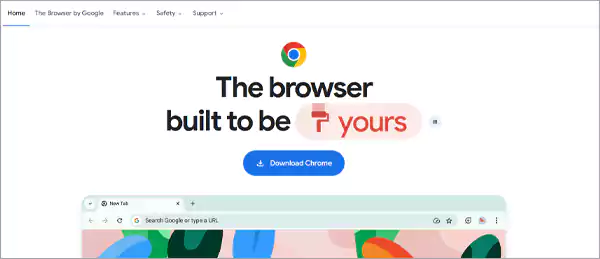
- First, open Firefox on Ubuntu and go to the Google Chrome official website.

- Now, Click on the Download Chrome button in the center of the page.
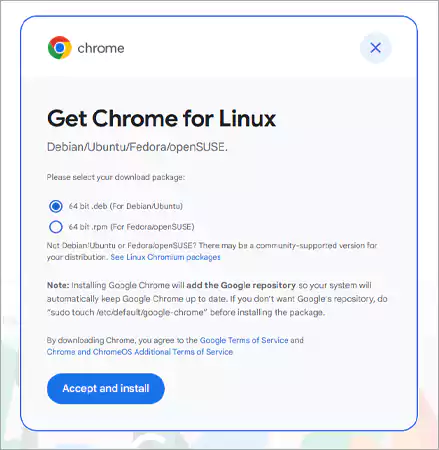
- Choose the Ubuntu option, and then click on the Accept and Install button.

- Once the .deb file is downloaded, head over to the Downloads folder.
- Select the .deb file and double-click on it. Think of it as an .exe file in Windows.
- After double-clicking, it will open the Ubuntu Software Center, and you should see an option for installing Google Chrome Now. Just click on the Install button to begin the process.
- Before installation, the system will ask for your password. So, you need to enter your account password to begin the process.
- It will take just a minute or two to complete the Chrome installation on Ubuntu. And once Chrome is installed, you will see the Remove button in the Ubuntu Software Center.
Once Chrome is installed, go to the Search Menu in Ubuntu and search for Chrome. Click on the Chrome icon to start using your newly installed browser.
Step-by-Step: Install Chrome on Ubuntu through Terminal [Method 2]
What you’ve just read above can also be done through the terminal in Ubuntu. People who prefer to use the command line in place of the graphical interface are more than welcome to try this method.
Using the terminal, you can install Chrome on Ubuntu by following just a couple of steps. However, it is not as easy as using apt-get install chrome; it’s not super complicated either. So, don’t worry too much about it.
To install Google Chrome on Ubuntu through Terminal, just follow these steps.
- Go to Search and type in ‘Terminal’.
- Double-click on the terminal to open it.
- Now, use the following command to get the .deb file from the internet.
wget https://dl.google.com/linux/direct/google-chrome-stable_current_amd64.deb
- Once the file is downloaded, you need to install it using the following command.
sudo dpkg -i google-chrome-stable_current_amd64.deb
- That’s it; you are done, and Chrome is installed on your device. Here, dpkg is used for installing, upgrading, configuring, and removing software.
You will now see that Google Chrome is now available in your applications menu in Ubuntu. Open Chrome and start using it. You will be able to use the internet through Chrome just like you would on any other platform, like Windows or macOS.
For quick access to Chrome, we suggest you try adding it to your favorites. To do that, find Chrome from the list of applications, right-click on it, and choose the ‘Add to Favorites’ option.
Suggested Read: How to Fix ChatGPT error
One Click to Chrome Command: Set it as Your Default Browser Now!
Now that we’ve seen how you can install Chrome on Ubuntu, let’s look at how you can set Chrome as your default browser.
To set the default browser to Chrome on Ubuntu, you need to go to search and type in ‘Default Applications’ and then press Enter to open it.
Now, select the Chrome browser from the Web section as your default browser, and you’re done.
FAQs (Install Chrome on Ubuntu)
Ans: Yes, Google developed its software for Linux distributions as well. Just go to google.com/chrome on your Linux distro and follow the steps from there. We’ve also mentioned the same steps in this article.
Ans: First, open the terminal, type in Chrome, and hit Enter.
Ans: For that, you need to open Chrome and then enter ‘chrome://version’ in the URL bar and hit Enter. You will see a page with information regarding the Chrome version installed on your device.

